FREE SHIPPING ON USA ORDERS OVER $150
FREE SHIPPING ON USA ORDERS OVER $150
July 02, 2018 0 Comments
There are some truths and a lot of myths out there about wooden cutting boards. This is part 1 in a series of 3 blog posts I’ll be releasing on the topic. I’ll take some time to debunk some popular beliefs about them and shed some light on these three topics in particular:
- How to choose a good cutting board
- How to care for your cutting board
- How to fix a warped cutting board (if you didn't follow the first two!)
Sign up HERE to make sure you are the first to know when we release new products and useful information.
Recently I was having a conversation with some customers at a craft fair about the best way to flatten a warped or cupped cutting board; it became obvious that there are a lot of old wives’ tales and confusion about the best way to do so. (It reminds me of many a conversation about the proper way to wash, use and season a cast iron pan)! So, I thought I'd take a minute to set the record straight, specifically on why we suggest the “turn it over” method and why this super simple method works.
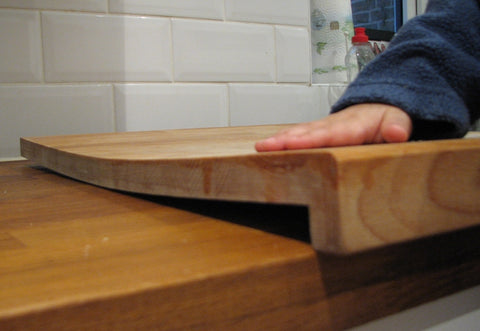
- This cutting board has seen better days - but could still be flattened!
Let’s assume that you have a warped board. Warping takes place because your board wasn't built properly, or has not been properly cared for. What to do? There are a lot of crazy suggestions out there. Here are a few that I have heard during conversations:
Iron method – put a wet towel over your board and iron it.
Steam method – steam one side of your board over a pot of boiling water.
Force and water method – soak the board in water, then set it under a bunch of weight until it’s dry.
Grass and sun – lay your board in some wet grass and let the sun beat down on the top.
Take it to a woodworker – take it to your neighborhood woodworker and have them fix it.
And here is our suggestion:
Just turn it over! – turn your cupped board over so the convex side is facing up (so it is resting on the 4 corners and the middle of the board is raised off of your counter) and leave it there until it is flat. It sounds too simple to work, but there is a lot of science behind this super simple method!
To shed some light on why we think this is the best method for flattening a cutting board, let’s talk about why boards cup in the first place. Cupping occurs because the moisture content on one cutting face is different than the other. This is the same thing that happens when you set a kitchen sponge on the counter and one side dries out before the other - it cups. This is the same thing that happens when mud dries faster on the top surface than on its bottom surface - it cups. It's also what happens when you leave a cutting board flat on a countertop and the top dries more than the bottom - it cups!
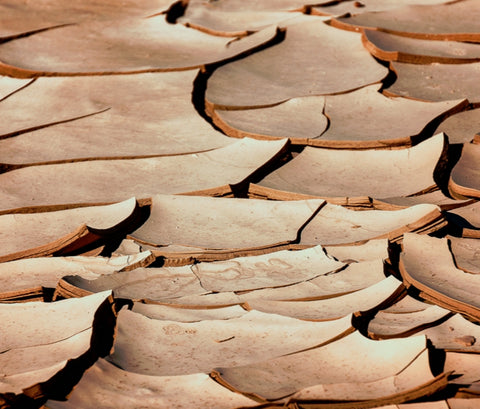
- Cupping seen in nature
When one surface of a board, piece of bread, sponge, or mud dries, it shrinks. Conversely, when a surface soaks up water, it expands. This contraction and expansion causes cupping. This 2” thick piece of wood, for example, when totally dry, measured 3 7/8" across both the top and bottom. After one night of sitting in a shallow pan of water, the top still measures 3 7/8”, but the bottom now measures 4" across and the board is visually cupped!
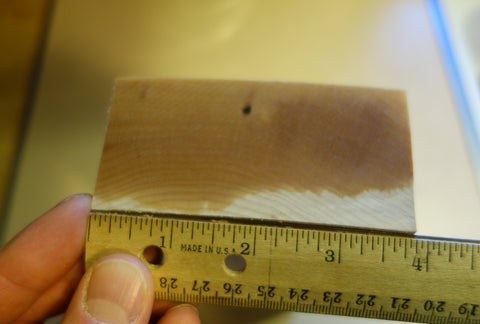
- Dry wood board width - 3 7/8"
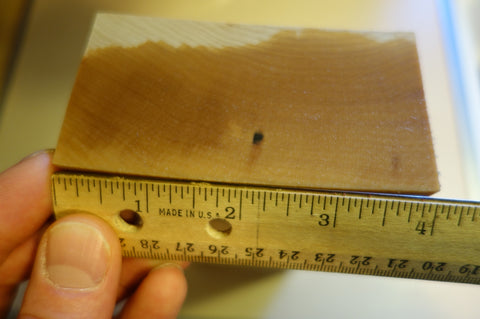
- Wet wood board width - 4"
This visual cupping is only across 4" of board. Imagine if you did this to a cutting board that was 4 or 5 times that wide; you could almost eat cereal out of your cutting board! A side note... did you think you could eliminate cupping by buying a super thick cutting board? Think again.
While our method is similar to the examples given in the opening of this post, those techniques can be bad for your cutting board. Heat and moisture methods have a tendency to flatten your board in the short term but return to their warped state shortly thereafter. Applying unnecessary heat or moisture to your cutting boards causes internal stress in the wood eventually making them weak or breakable. I admit it, woodworkers aren't the solution to all your problems either!
If you have a cupped cutting board, skip the iron, skip the steam, skip the grass, skip the trip to the wood shop (although that would be fun) and simply turn your board over. Exposing the damp side of the board to air evens out the moisture content allowing your board to flatten back out. While this method may take a few days, or weeks in the worst cases, it remains the gentlest, most permanent way to flatten a warped cutting board.
Here are some pictures from a recent test I conducted using the "turn it over" method. It works amazingly well!
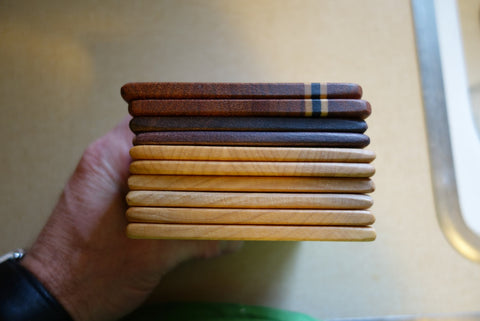
- Stack of 1/4" thick cutting boards fresh from the woodshop

- the same boards after a 12-hour soak in a shallow pool of water.
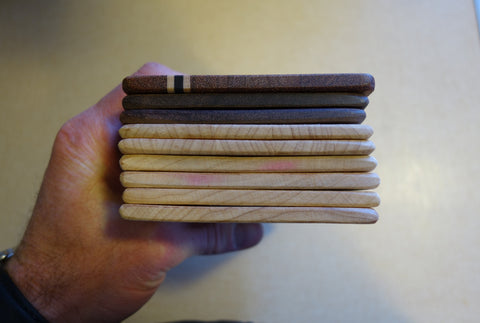
- The same stack of cutting boards after drying out for about a week.
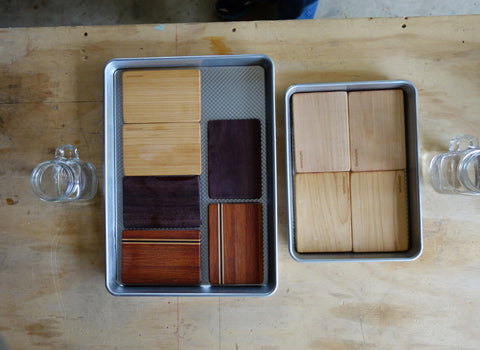
- Hey Charlotte... No baking cookies until my experiment is done!
The boards went all the way back to flat with no heat, no pressure, and no extra water.
After your board dries and flattens out be sure to follow our best practices for caring for your cutting boards.
Be sure to let us know how this method works for you.
Please share or Pin if you know someone who could benefit from this info!
June 26, 2018 0 Comments
“What is the best oil to treat wooden utensils and cutting boards with?”
It’s a question we get every time we are out selling Earlywood products and it’s easy to see where the confusion comes from. There are old-fashioned treatments and modern oil blends that all claim to be the best way to preserve wood used in the kitchen. So let’s take a look at your options for treating wood, and clear up the confusion.
There are essentially two kinds of oil used for treating wood, oils that harden, and oils that don’t harden.
Oils that harden, including polyurethane and varnish are basically what you’ve got on your furniture. Based on smell alone, it should be obvious why they are not good for anything that comes into contact with food, yet we do occasionally see people use it. It creates a shell around the utensil that, with use, will eventually crack and chip off in your food. Not good, friends. Not recommended.
Oils that don’t harden, include food-based oils, linseed oil, tung oil, and petroleum-based oils. These all offer safer protection, but they’re not all equal.

Food based oils like olive, corn, vegetable, and canola oils will never dry and chip off into your food like hardening oils, but they can discolor your utensils, thicken, and go rancid, giving your spoons and cutting boards a rotten smell. Have you ever see an old cutting board that someone is selling at a garage sale that is yellow and sticky on the surface? It is that way because they most likely treated the board for years with one of these food-based oils. These oils are especially troublesome when used on counter top cutting boards that don’t get a thorough washing very often.
An exception to the typical food-based oils, is walnut oil. It’s widely recommended because it doesn’t go rancid. It dries, unlike the other oils in your kitchen. However, it can still get a tacky feel. If you’re a believer in walnut oil, be sure to apply it only to utensils you use – and wash – often. That should help keep it from developing a thick, sticky coating.
Another option is tung oil. It does a good job. It will dry, which will keep it from going rancid, and it shouldn’t create a sticky buildup, but to get a proper coating you’ll need to spend 7-10 days coating and drying.
We should also mention beeswax. It’s a safe option. It will give you a shiny smooth surface and be essentially waterproof. This sounds like a good thing, but the problem is that it is hard at room temperature, and as soon as you dip that treated spoon into a hot dish, the wax immediately melts into your food, thus losing most of its protection. Beeswax is often blended with mineral or other oils and is dubbed as “spoon oil”. We have found that the addition of wax to mineral oil only thickens the oil, makes it harder to apply and restricts the depth to which it can soak in. Therefore, we’re not huge fans.
So, we’re down to petroleum based oils, and within that category is our recommendation for treating your utensils, mineral oil. Mineral oil gets a bad rap from time to time because it is petroleum based. If you are anti petroleum products, that’s your thing and that’s just fine. We’re not here to convince you otherwise, we’re just here to tell you what works best for oiling wooden spoons!
Mineral oil has a lot of great qualities when it comes to treating wood that will be in contact with food. Here are a few of its benefits:
- It’s 100% food safeWe specifically recommend a low-viscosity mineral oil for the task. Viscosity refers to the thickness of a liquid. On one end of the spectrum you have high viscosity liquids like hydraulic fluid and the other end of the spectrum you have very low viscosity oils like WD-40. The mineral oil that we use and sell on our website is lighter than water and penetrates deeper into the wood than thicker oils. We add a little lemon peel oil, which has antimicrobial properties and you get to enjoy the refreshing lemon scent while you oil your spoons.
We hope that clears things up for you a bit. Now, go oil your utensils and cook something great!June 05, 2018 0 Comments
Ah the cast iron pan; bane of my childhood dishwashing career; revitalized culinary accoutrement.
Growing up, there was nothing I loathed more than cleaning our old cast iron pan. As a child, I failed to understand the balance of strength, heat conductivity and non-stick super powers cast iron possesses; all I knew was that it was heavy and there were lots of rules about cleaning it. During my tenure as a college student, my relationship with cast iron cooking was reignited when my friends and I would make large batches of stew in my newly acquired Dutch oven. I cringe as I recall scrubbing burnt bits of stew from my Dutch oven in the nearest creek, using, gulp, steel wool.
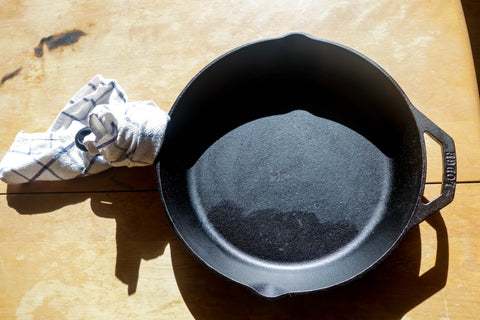
-My favorite Lodge cast iron skillet
Today, my Dutch oven is an indispensable part of my kitchen’s arsenal. The steady, high heat of cast iron is the perfect tool to sear a roast before slow cooking it in the oven; it makes quick work of stir fry thanks to its ability to maintain high heat. My favorite application for cast iron, however, is making desserts. That’s right, desserts. At least once a summer I think it’s a good idea to invest in a whole box or flat of fresh fruit- damn those CSA’s! Fortunately, or unfortunately, depending on your taste buds, the fruit usually all ripens at the same time. As I am not a canner, the second best application for excess quantities of ripe fruit, in my humble opinion, is to make a crisp! The epic peach cobbler of 2012; the blackberry crisp of 2015; what will it be this year? While I cannot predict the fruit I will inevitably over-purchase, not be able to eat then mix into a fabulous campfire treat, I can tell you that cooking with cast iron is easier than many believe.
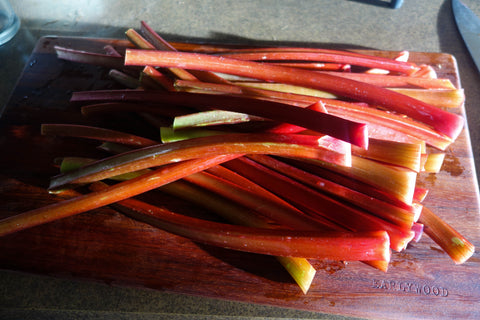
-Rhubarb on the chopping block.
If you long to reconnect with grandma’s old skillet or dust off your Dutch oven of yore, follow these five simple steps to cast iron cooking to keep your pans in tip top shape.
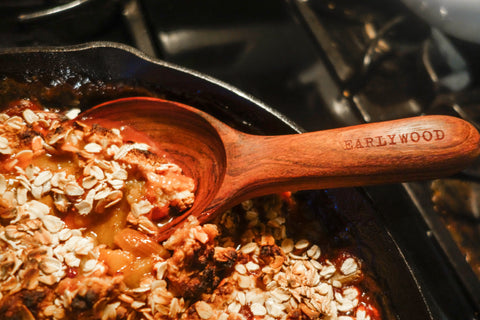
-Hot, bubbly strawberry-rhubarb crisp.
Cooking with cast iron is one of life’s simple pleasures. With a few easy steps, your cast iron will live a long, fruitful life, being passed through the generations as a family heirloom.
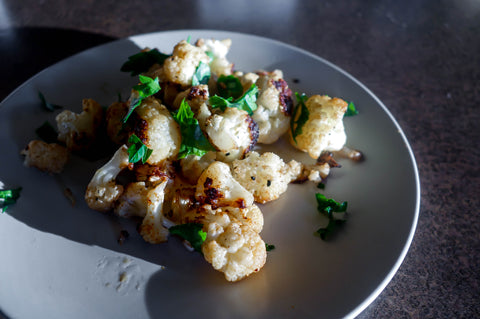
-Cast iron roasted cauliflower.
Have experience cooking with cast iron? Leave us a comment below!
May 21, 2018 0 Comments
Each spring, people from all walks of life work themselves into a frenzy in anticipation of what is undoubtedly the health industry's second favorite season; swimsuit season.
Long forgotten New Year's resolutions are re-ignited with the force of a category four hurricane as we try to work off the effects of months worth of bad habits in a few short weeks. (I mean, chili cheese fries are considered a food group during ski season, right)? Time to trade the beer cheese sauce for something a bit more waist wise; a green smoothie.
While swimsuit season in Montana consists mainly of icy dunks into mountain lakes, weekend floats on the river and the occasional afternoon at the town pool with the kids, we like to make sure our pasty bodies look toned and trim while we're doing it!
-Easy, delicious green smoothie with pineapple & spinach
Fortunately, there are some easy fixes that can make a big difference in your bikini bod and overall health. Green smoothies are an easy way to kick-start healthier eating and drop a few pounds. The beauty of the smoothie is it's adaptability; you don't need a lot of fancy ingredients or high priced supplements to blend up one of these nutritious shakes; just throw in what you've got and call it a day! However, if your looking for some inspiration, check out a few of the scrumptious combos below.
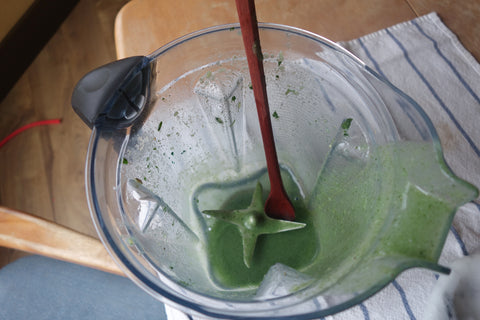
-Turns out our tasting spoons are perfect for avoiding awkward blender mustaches and reaching every last drop!
And remember, while green is the new black in the smoothie world, it's not how it looks, it's how it performs. Forget the Insta worthy photos and make something that nourishes your body from the inside out.
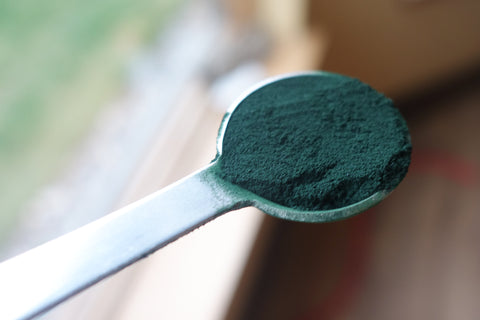
-Nutritional superhero, SPIRULINA!
Basic Green Smoothie Recipe
Start with this easy green smoothie recipe then tailor it to your liking.
-2 Large handfuls of greens (baby kale, spinach, broccoli, arugula if you're spicy)
-One small banana + up to 1.5 C fruit and veggies of choice
-1 C liquid (milk, coconut water, water, La Croix, almond milk, etc.)
-1 C ice (optional)
Optional Add-Ins
Get creative with your add-ins! This is where the fun of smoothie making kicks in
-1 Tbs nut butter (peanut, almond, cashew)
-Add avocado for a creamy texture and healthy fat
-Ginger, cinnamon, turmeric, maca, spirulina, bee pollen, cayenne
-Chia seeds, hemp seeds, ground flax
-Fresh herbs
-A scoop of your favorite protein powder
I realize some of these ingredients may seem odd or dare I say- icky- but they are easily disguised by the robust flavor of fruits. You won't know what's hiding in your shake after it's all blended up, and, your body will thank you!
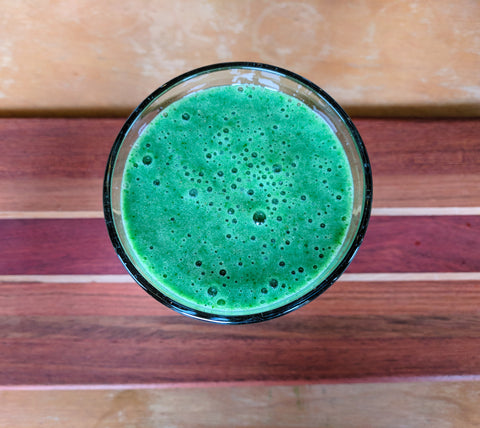
Claire's Favorite Combos
Pineapple-Cilantro Refresher: Add these two items to the basic smoothie recipe for a refreshing, cleansing taste. Coconut water for the liquid ups the hydration factor. A note to the wise, be careful with the cilantro, a little goes a long way!
Chocolate-Berry Bliss: A scoop of chocolate protein powder plus mixed berries makes for a yummy, dessert-like treat! I skip the banana on this one.
Vanilla latte: Add a cup of cold coffee, a shake of cinnamon, 2 tsp vanilla extract and almond milk to start your morning off right!
Brad's Favorite Combos
Trash Can Smoothie: No frills here. Take whatever you have in your fridge- broccoli included- and blend it up. Make a giant batch in the morning and drink throughout the day.
Salted Caramel: Vanilla protein powder + salted almonds + caramel extract. Enough said.
Have a great smoothie recipe of your own? Know another magical trick to get us looking our best for those days we're out casting a line in the summer sun? Leave us a comment below.
May 08, 2018 0 Comments
Spring is in the air and I know I can speak for the entire Earlywood crew when I say our excitement to trade Muck Boots in for flip flops is unparalleled! The promise of warmth, new life and green grass is becoming a reality with every passing day. Busier schedules are a reality as well, with baseball, yard work and grilling on the deck taking precedence in our rigorous schedules.
For weeks I have felt overwhelmed by the urge to clear my house of unneeded and unwanted possessions; to eliminate the chaos and prepare for a simpler, more organized summer. The mood struck particularly hard this weekend as I frantically searched for my favorite Tera Scraper while my scrambled eggs began to stick in the pan. (Ugh, burnt eggs). The extra-large drawer next to my stove which houses most of my utensils has been the bane of my culinary existence for months now. After digging through the multitude of items for the umpteenth time, it became abundantly clear; there were too many utensils and not enough cooks in my kitchen.
- Severely overloaded utensil drawer.
I couldn’t help but look at the array of utensils with disdain, partially blaming them for the uninspired meals I’d been serving lately. (Cheese quesadilla anyone)? How, may I ask, is a cook to prepare a light, fluffy omelet while wielding a melted plastic spatula as her sword? How can delicate spring greens be transformed into an ennobling first course when they are served from the gnashing jaws of cheap metal tongs? It was time to reclaim the inspired beauty with which I had once prepared food; it was time to purge the utensil drawer.
- Old, disgusting utensils.
Professional organizers tout a myriad of techniques to sort through and organize your belongings. A popular Japanese consultant urges one to physically hold each item in their home, begging the question “does this bring me joy”? Others argue a timed approach to clearing clutter is most effective. From the spiritual to the ultra-structured, what we choose to surround ourselves with is ultimately a reflection of the life we hope to lead.
-Success!
My decision-making process on which utensils to keep and which to discard was guided by some pretty basic questions.
- Is it useful? More often than not, I found a large overlap in the functionality of different items. (I’m looking at you garlic press! Who wants to clean out those tiny perforations when a good old-fashioned knife makes quick work of chopping this essential allium)? If another, more universal tool gets the job done, stick with that.
- Is it broken or outdated? While I hate to admit it, I found a cheap, scratchy, wooden spoon hiding next to my gorgeous Jatoba Server. The poor quality of this item, exacerbated by the fact that I regularly put it through the dishwasher cycle, made it stick out like a donkey at the Kentucky Derby. Cue- trashcan.
- Do I even like this? When I use my ebony scraper, it feels like I’m creating something special to eat, something to be savored, something like my mom would make. Transferring that warm, fuzzy feeling to food is a way to deeply nourish those you love in the most basic sense. Sayonara melted plastic spatulas!
What remained at the conclusion of the sorting was a serene space of culinary joy. I felt satisfied that I had curated such a charming yet serviceable collection of utensils. While our clutter comes in different shapes (grandma’s insistence on saving every glass jar that ever held a pickle) and sizes (really do we need another pair of Christmas socks?) getting down to the essence of what and why we retain our possessions can be liberating. I understand that conquering my utensil drawer is a far cry from concocting a perfectly set creme brulee, but, nonetheless, I was left feeling lighter and more adept; clear of mind and palette. I was left feeling a little bit inspired.
- Inspired radicchio salad with lemon-caper dressing
Happy spring cleaning!
April 23, 2018 0 Comments
…a place where the beer flows like wine (literally, from Red Lodge Ales) and the beautiful (mountain) women instinctively flock like the salmon of Capistrano. I’m talking about a little place called Red Lodge.
Is it appropriate to start a post by summoning the spirit of the feeble-minded stooge Lloyd Christmas? Probably not. Is it honest to make this connection when introducing the locale in which we have chosen to establish our business? We think so; when you are talking about a place as exceptional as Red Lodge, Montana; the place where we hand-make our wooden spoons every day; the place we call home.

Red Lodge is nestled at the base of the Beartooth Mountains, a mere 68 miles from the Northeast Entrance of Yellowstone National Park. The drive from Yellowstone to Red Lodge takes adventurous visitors over the Beartooth All American Highway- a pass topping out at 10,947’ – with scenes reminiscent of the cross-country scooter journey by two of America’s most unlikely heroes-Lloyd and Harry. While we don’t advocate travelling long distance on scooters with a pull start, we do advocate experiencing the road less traveled- the road to Red Lodge.


So as the winter melts away into spring and the possibility for new beginnings emerges, we encourage you to hop on your scooter and find your way to your own special destination. And, if you wind up in Red Lodge, give us a holler.
March 20, 2017 0 Comments
Those of you who read Earlywood’s news may recall that one of our bloggers is Lexy Adams (yes, the Lexy Adams). A freelance writer, Lexy has spent a lot of time thinking and writing about food: from the way it’s produced to how it’s cooked. Her work has been published by Oxford University Press and she’s written for National Geographic Traveler, The Boston Globe, Saveur and others. Along the way, she’s interviewed some interesting food and ag folk. We thought it’d be fun to profile a few of those people here from time to time. Here’s the first.
* * *
A few years back, I was sent to a little village in the Piedmont region of northern Italy to interview one of my longtime heroes, Carlo Petrini, the founder of the International Slow Food Movement. Petrini first came to prominence in 1986 when a McDonald’s opened near the Spanish Steps in Rome. Rather than embrace the advent of fast food in Italy, Petrini set about creating resistance to it. The result was Slow Food.

Lexy and the extraordinary Carlo Petrini.
Back then, Slow Food’s mission was to work against the disappearance of local food traditions. Since, the organization’s vision and membership have broadened and today it’s supported by more than 100,000 members in 150 countries, from Africa to Asia to the Americas. There’s even an international Slow Food Youth Network with chapters in Cuba, Mozambique, even Kazakhstan. Slow Food’s members work to promote good, clean and fair food. In other words, says Petrini, the food we eat should taste good, it should be produced in a way that doesn’t harm the environment or our health, and food producers should receive fair compensation for their work. Petrini believes that each consumer’s food choices have consequences all over the globe.
When I first heard about Petrini in the mid-1990s, I was pretty smitten with his work, but I never imagined I’d meet him. When I finally did, I found him to be laid-back, elegant in a down-to-earth kind of way, and—above all—passionate about the ideals that fuel his extraordinary endeavors. In addition to Slow Food, Petrini started the University of Gastronomic Sciences, which is where I met with him (and is where I’d attend college if I could do it all over again!).
For more information about Petrini and Slow Food’s efforts, click any links above. For information specifically about Slow Food in the United States, visit Slow Food USA.
October 18, 2016 0 Comments
Last week, we took the kids to our favorite pumpkin patch. The day was classic autumn with crisp cool air and the leaves on the trees fluttering like little golden flags against a blue Montana sky. Our kids had the time of their lives feeding the goats, running through the corn maze and picking pumpkins. It was the best kind of day to usher in autumn…Just like a pumpkin spice latte is the best kind of drink to do the same! What is it about pumpkin spice that says, “cozy” and “fall”?

- yeah... it was pretty
Here’s a recipe for my favorite late-October pick-me-up.
Ingredients:
1 cup of milk
1 tablespoon pumpkin spice syrup
1 teaspoon vanilla simple syrup
2 shots of espresso or 1 cup of coffee
To garnish:
Whipped cream
Pumpkin spice mix: equal parts cinnamon, ginger, nutmeg, and ground clove
Earlywood Ingredients
1 toddler spoon
1 coffee scoop
Directions
Enjoy!
October 04, 2016 0 Comments
Until I began digging around for a recipe for homemade Nutella, the Italian chocolate-hazelnut spread that’s taken America by storm, I had no idea just how interesting its history was.
The story begins in Piedmont in northwestern Italy during the Napoleonic Wars. Sidled up against the Alps, Piedmont is known for its centuries-old love affair with chocolate—and for its chocolate producers’ expertise. (It is said Swiss chocolate makers came to the region’s capital, Turin, to learn their trade.)
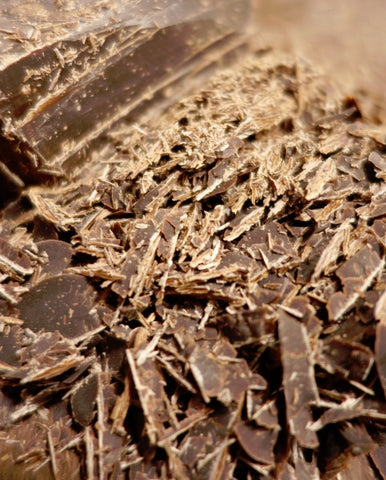
This love affair flourished from the late 16th century until 1806, when it was stymied by Napoléon’s “Continental blockade,” which ordered France’s allies to cease trade with the Brits. Napoléon’s intent was to paralyze the British economy; instead, the embargo backfired, causing France and its allies to suffer from a steep reduction in trade. One of the blockade’s ramifications was a sudden and extreme shortage of cocoa. This left the Piedmontese scrambling. As it happens, the world’s most prized hazelnuts grow prolifically in the hills of southern Piedmont. We’re not sure who discovered that, when roasted and ground with chocolate, the nuts would not only help stretch a scarce resource, they would compliment it deliciously.
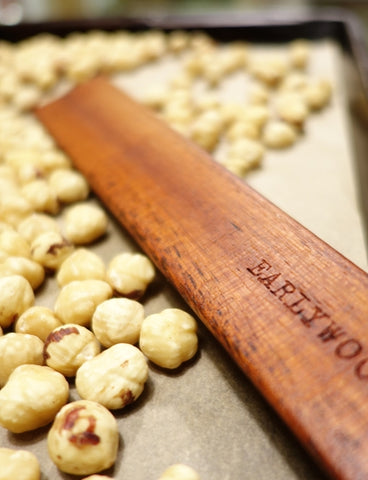
Fast forward to 1946 when a pastry maker named Pietro Ferrero responded to yet another shortage of cocoa—this time caused by WWII rationing—by creating a spreadable blend of ground hazelnuts, sugar and a bit of that precious chocolate. Ferrero shaped this product, which he called “Giandujot,” into a loaf that could be sliced and served on bread. With time, under the Ferrero Company’s ownership, “Giandujot” became “Supercrema.” Pietro’s son, Michele, tinkered with that recipe and in 1964 he released a spreadable chocolate he called “Nutella.” Today, the Ferrero family still owns the company (almost an astounding feat these days when Nestlé owns nearly everything else).
Why make homemade chocolate-hazelnut spread? First of all, it’s fun. Second, the results are delicious. And then there’s a third reason: have you ever looked at the ingredients in a jar of Nutella? They’re not bad. I mean, it’s not as if we’re eating this stuff in quantity, but the first ingredient isn’t hazelnuts or even chocolate. It’s palm oil. The next is sugar. And then, the Nutella we buy in the States is made in Mexico. But I digress…
Most of the homemade Nutella recipes I found use hazelnut oil rather than the nuts themselves. I wanted to find the closest approximation of the traditional Piedmontese concoction, so I looked to one of my favorite cookbook authors and bloggers, David Lebovitz. David’s written seven cookbooks, five of them focused on dessert, one of them called The Great Book of Chocolate. For that reason, he’s my go-to when I’m looking for dessert recipes, especially desserts made with chocolate. Born in the States, David’s lived in Paris since 1999. He adapted this recipe from the Encyclopédie du chocolat, un ouvrage essential, according to the reviews on Amazon (which means, Google Translate tells me, “an essential book”).
The truth is, I would like this recipe to be a bit more chocolatey. And that can be accomplished easily by adding more bittersweet chocolate, or throwing in a handful of roasted ground cocoa nibs. That said, this opinion didn’t keep me from eating 2/3rds of the contents of one of the jars I made…in less than two days. It’s delicious, especially on a warm slice of good bread.
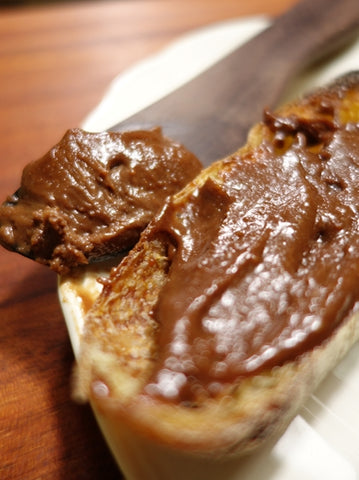
Homemade Chocolate Hazelnut Spread (with thanks to David Leibovitz and Encyclopédie du chocolat)
Ingredients
1/3 cup whole almonds
1 1/3 cup hazelnuts
1 3/4 cup whole milk
7/8 cup powdered whole milk
3 tablespoons mild-flavored honey
pinch of salt
6 ounces bittersweet or semisweet chocolate, chopped
5 ounces milk chocolate, chopped (I used high-quality milk chocolate chips)
Earlywood Ingredients
1 tera scraper
Instructions
*My food processor broke a few months back. Since then, I’ve been using my Ninja in place of a food processor and the Ninja works just fine. The only possible challenge—getting the chocolate-hazelnut mixture out of the bottom and sides of the vessel—was easily remedied by my Earlywood l flat sauté, which retrieved every last bit.

September 20, 2016 0 Comments
Who doesn’t love a chocolate chip cookie? My kids and I surely do, but from time to time I like to tinker with the classic Toll House recipe in search of a little variety. Sometimes, my experiments work. Other times, not so much. When I read a recipe in The New York Times recently, which calls for using tahini in the dough and sprinkling a bit of flaky salt onto the cookies after they’ve baked, I had to try it. I’m happy to report the results were scrumptious. The tahini—a sesame seed paste with Middle Eastern origins—adds a delicious depth and nuttiness to the cookies while the salt compliments the chocolate chunks deliciously. Give it a try!
Ingredients
Earlywood Ingredients
1 l flat sauté – such a useful tool for mixing cookie dough
1 tera scraper – great for removing cookies from the pan
1 tasting spoon – great for (can you guess?) tasting the dough!
Instructions
Place the cookies on the baking sheet. Bake 13 to 16 minutes until just golden brown around the edges. As cookies come out of the oven, sprinkle lightly with salt. Let cool at least 10 minutes on a cooling rack before devouring viciously.
August 24, 2016 0 Comments
I love summertime and all the fresh produce it yields. With so many fruits and veggies at our fingertips, I thought it a good idea to share a few of our seasonal go-to recipes. Let’s begin with sweet corn which finally made its appearance at our local farmer’s market this past week. Picked in the morning, it was sweet, but not too sweet, fresh, tender and delicious by the time it hit our plates. While really good sweet corn doesn’t need much messing with, I like to try new approaches from time to time.

Here’s a recipe that’s a play on traditional Mexican Street Corn, but much lighter, allowing the corn’s flavors to have as much a say as the other ingredients. The recipe calls for grilling the cobs until they’re just charred and then dressing them with a simple, south-of-the-border-inspired compound butter. Mmmmm…summertime!

Ingredients
Earlywood “Ingredients”
Instructions
For the compound butter:
Mince the garlic. Combine it with the butter, lime and chile powder. Allow the mixture to mellow at room temperature for about an hour.
For the corn:
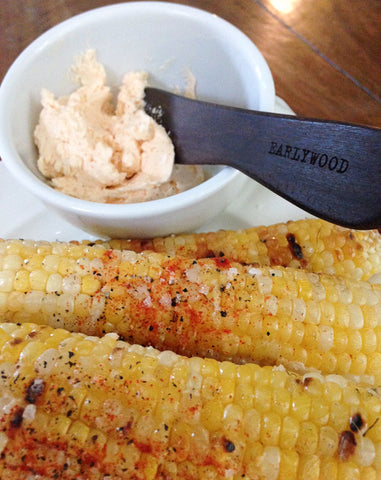
Variations: Try adding lime zest and minced cilantro to your compound butter. If you make the butter ahead, roll into a log shape in parchment paper or plastic wrap and keep it chilled in the refrigerator. When you’re ready to serve the butter, cut it into serving-sized slices for each plate.
*Grilling in the summer not only adds a little je ne sais quoi to the flavor of your food, but when it's hot outside (and in your house)... it keeps the heat outside! If you don’t have a grill, follow these instructions for an easy alternative to grilling corn.
Happy eating!
August 09, 2016 0 Comments
We’ve received some great responses to our blog posts lately, including a few suggestions for the cookbooks and food podcasts that you love. We’re taking note and if the list continues to grow, we’ll post it here. If you have any resources you’d like to share with us, and with our readers, please post those in the comments section below. And be sure to include a few words—or more—about just what it is you like about that book or podcast. Don’t be shy…we look forward to hearing from you!
For this post, however, we plan to look at an entirely different genre of food writing— what some call food literature. Under that wide umbrella falls a vast array of titles, from food memoirs to food-oriented travelogues to investigative journalism that explores and exposes the cracks and controversies in our food systems. Because there are so many good titles out there, today we’ll focus on the autobiographical, saving the rest for another day.

- Bert Green, James Beard, Julia Child cooking at MFK Fisher's house in CA in the late 1970s. Copyright The Schlesinger Library, Harvard University
Food memoirs and other epicurean lit are popular these days. Julie and Julia: 365 Days, 524 Recipes, 1 Tiny Apartment Kitchen is a good example of a book that went big, becoming a Hollywood hit that charmed the critics, including this one at The New York Times. But quality food writing has been around a long time—at least since the early 3rd-century AD when the Greek gourmand and author Athenaeus wrote his fifteen-volume work, The Deipnosophistae, or The Banquet of the Learned, in which the protagonist, Ulpian, is the host of three long, leisurely banquets throughout which food, literature and history are discussed. For this post, we won’t look back to Ancient Greece, but we will look to the early 20th century when modern food lit really got its start. Whether you’re new to the genre or an old hand, we hope this list will guide you to a few new gems.

The Art of Eating, by M.F.K. Fisher
Born in 1908, Mary Frances Kennedy Fisher is known not just for being the greatest American food writer, but also one of our greatest writers. She is the author of 27 books and her works on food are always much more than works on food: they’re compelling blends of autobiography, culinary history, fable, and cookbook. It is the five books written from 1937 to 1949 collected in The Art of Eating that are at the heart of her work: Serve It Forth; Consider The Oyster; How To Cook a Wolf (written during the Second World War to inspire cooks daunted by wartime shortages); the memoir called The Gastronomical Me; and An Alphabet for Gourmets.

- Fisher
Fisher wrote often and lovingly about her many kitchens and cooking tools—from Dijon, where she developed her love for French food, to her kitchen in northern California, in which she spent her last days. She appreciated beauty and efficiency, so we like to imagine that, were she with us today, she would appreciate Earlywood’s designs, perhaps especially our medium classic ladle, which is so timeless it could just as easily fit in a rustic kitchen in France as it does in our kitchens here in Montana.

Honey From a Weed: Fasting and Feasting in Tuscany, Catalonia, the Cyclades and Apulia, by Patience Gray
Born just nine years after Fisher, but an ocean away, in England, Patience Gray had much in common with her American contemporary, not the least of which was good writing. Both wrote about cooking during those years around World War II, when much of the U.S. and Europe were reeling from years of rationing; both lived, for at least a little while, with a view of the Mediterranean, where they cooked in simple, unpretentious kitchens; both were single mothers in the 1930s and ‘40s, when that was rare and, by many, looked down upon; and both had the grit and determination to keep the household flame lit, no matter the circumstances. Gray’s Honey from a Weed describes her years with her partner, the sculptor Norman Mommens, living near a series of marble quarries in remote regions of Italy, Spain and Greece—places where her neighbors foraged, hunted, gardened and cooked everything from scratch.

- Gray and Mommens
Part autobiography, part celebration of seasonal and local foods, Honey from a Weed is also a cookbook with recipes for the regional dishes Gray cooked in those very rustic places in her very primitive kitchens—in some cases without electricity or running water. When I was living on the southern Peloponnese Peninsula in rural Greece, I often looked to Gray for inspiration…and found it.
I can imagine Gray and Mommens enjoying a little handmade cheese from the shepherd down the road using our wooden cheese spreaders to serve it.

Tender at the Bone (and other memoirs), by Ruth Reichl
Fast forward to California’s food scene in the ‘80s and New York’s in the ‘90s and you’ll find Ruth Reichl. A former food editor for the L.A. Times and restaurant critic for The New York Times, she was the editor-in-chief of Gourmet Magazine for ten years until its abrupt closure in 2009. She’s written at least two cookbooks and, most recently, a novel, but the books I love best are her memoirs, which are candid and funny (and include recipes at the end of each chapter): Tender at the Bone, Comfort Me with Apples, Garlic and Sapphires, and For You Mom.
Ruth Reichl, what Earlywood product would you covet most? During her early years as a writer, she “couldn’t afford a rolling pin,” according to this interview from the Wall Street Journal, so she used an old wine bottle instead. Given her no-nonsense practicality, we think Reichl might enjoy our trifecta, which is what Brad calls the “perfect storm” of Earlywood utensils: our flat sauté, our tera scraper and our do-everything large spreader.

The Raw and the Cooked: Adventures of a Roving Gourmand, by Jim Harrison
Jim Harrison, who for many years spent his summers outside of Livingston, Montana, died at his writing desk at his winter home near the lovely Sonoita Creek in Patagonia, Arizona, this spring. The author of great works of fiction, poetry, and nonfiction, Harrison spent much of his life cooking and enjoying food and writing about it all. Much of his food writing appeared in Esquire and Men’s Journal and is collected in The Raw and the Cooked, one of the most-read books on my own bookshelf. About the book, the Santa Fe New Mexican exclaimed, “To read this is to come away convinced that Harrison is a flat-out genius—one who devours life with intensity, living it roughly and full-scale, then distills his experiences into passionate, opinionated prose. Food, in this context, is more than food: It is a metaphor for life.”
I would like to think that the man who held the view that “many of our failures in politics, art and domestic life come from our failure to eat vividly,” would have enjoyed our tasting spoon set, for he clearly took pleasure in tasting everything life had to offer him.
And here are a few other titles we love (and others we’ve read about and want to read), but don’t have room to carry on about:
My Life in France, by Julia Child
Climbing the Mango Trees by Madhur Jaffrey
The Sweet Life in Paris, by David Lebovitz
A Tiger in the Kitchen by Cheryl Lu-Lien Tan
Kitchen Confidential, by Anthony Bourdain
Blood, Bones, and Butter, by Gabrielle Hamilton
Heat: An Amateur’s Adventures as a Kitchen Slave, Line Cook, Pasta Maker, and Apprentice to a Dante-Quoting Butcher in Tuscany, by Bill Buford
Happy reading!
Lexy.

